Last updated on October 9th, 2022
If you own some ZIL, you may be looking to send it to your Metamask wallet. However, ZIL has its native Zilliqa blockchain, which can’t actually be added to your Metamask wallet.
The only way that you can add ZIL to your Metamask wallet is by the Binance-Peg ZIL token, which is native to the Binance Smart Chain.
Here’s a guide on how you can do so:
Can you hold ZIL on Metamask?
You are only able to hold ZIL on Metamask as the Binance-Peg ZIL token, and not the ZIL token that is native to the Zilliqa blockchain. This is because Metamask does not support the Zilliqa blockchain, but you are able to add the Binance Smart Chain to Metamask.
This is because the Zilliqa network is not EVM-compatible.
How to add Binance-Peg ZIL to Metamask
Here are 4 steps to add ZIL to Metamask:
- Go to Metamask and ensure that you are using the Binance Smart Chain
- Select ‘Import Tokens’, and then ‘Import Custom Token’
- Copy the Binance Smart Chain contract from CoinMarketCap
- Double-check that ZIL is detected and select ‘Add Custom Token’
You can watch this video guide here,
or you can find a step-by-step guide below:
Go to Metamask and ensure that you are using the Binance Smart Chain
The first thing you’ll need to do is to ensure that you are using the Binance Smart Chain on Metamask.
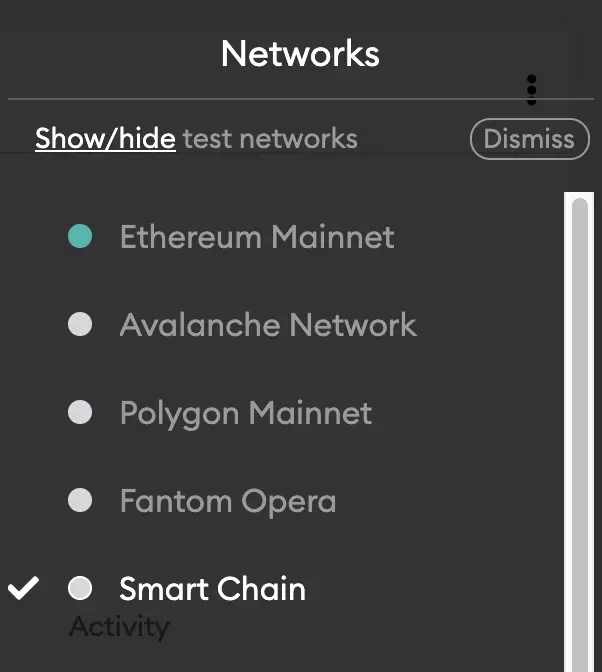
If you have not set up the Binance Smart Chain on your Metamask wallet, you can check out this step-by-step guide here.
Alternatively, you can view this video on how to add any new networks automatically with just one click:
Select ‘Import Tokens’, and then ‘Import Custom Token’
Once you’re on the Binance Smart Chain, the next step will be to select ‘Import Tokens‘.
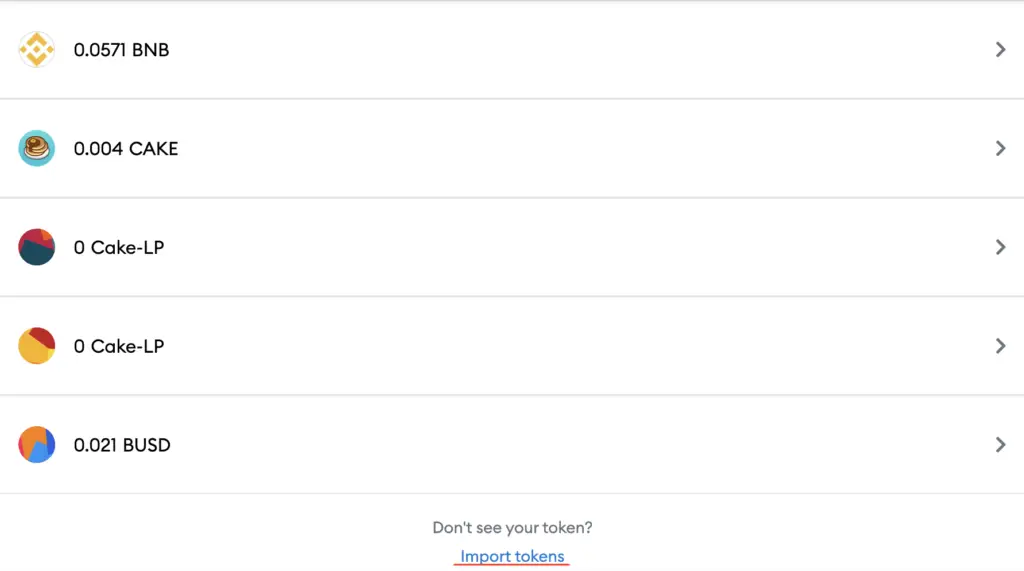
On the Binance Smart Chain network, you are only able to import custom tokens.
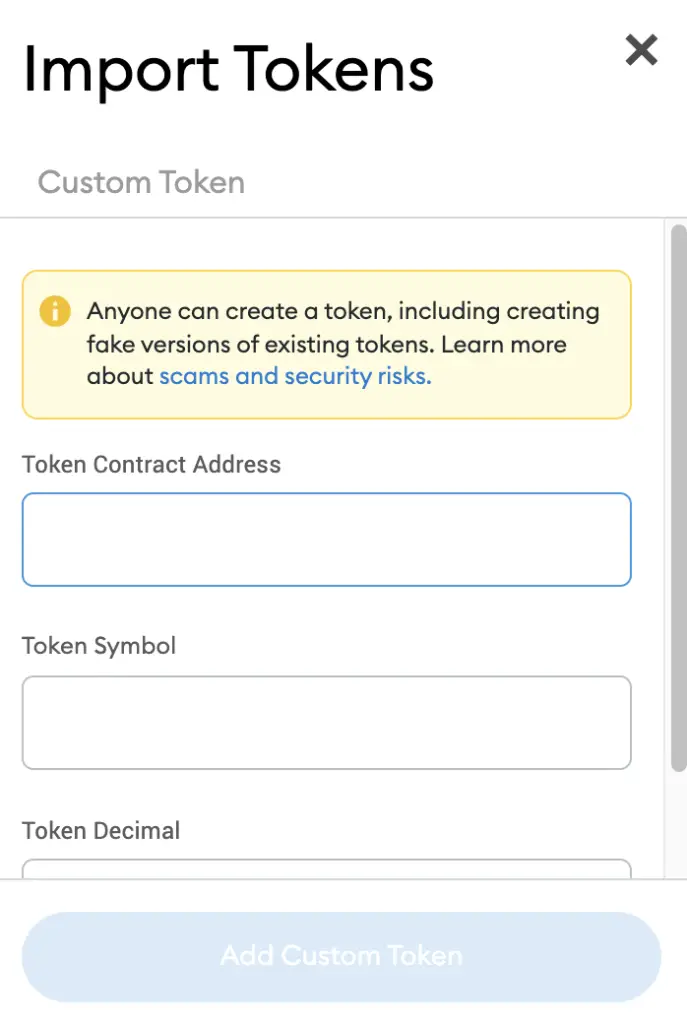
This is different from adding tokens to the Ethereum Mainnet, where you can search for and automatically add tokens like MANA or SAND.
Copy the Binance Smart Chain contract from CoinMarketCap
For the next part, you can go to the ZIL page on CoinMarketCap.
I prefer using CoinMarketCap to obtain the contract address, as it is one of the most reliable sites with regards to cryptocurrencies.
It is important that you ensure that the site where you’re obtaining the contract address from is a credible source!
There is a section called ‘Contracts‘, where you’ll see the BSC contract for ZIL.
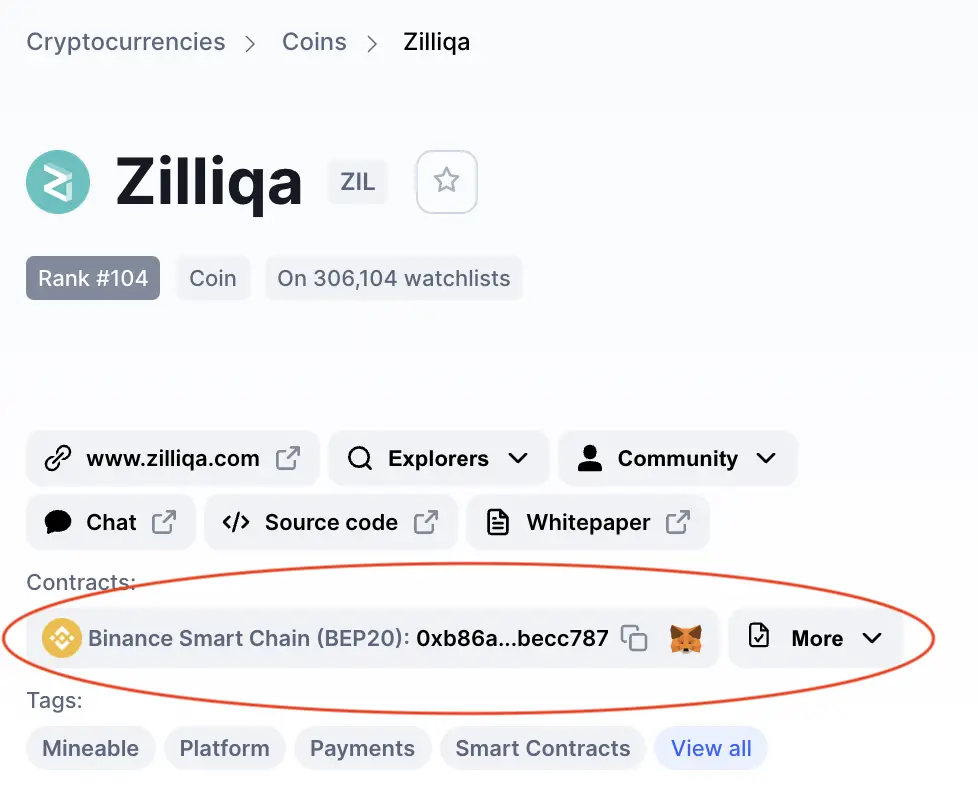
You can click on the contract and it will be copied to your clipboard.
If you select ‘More’, you would view the ZRC2 contract for ZIL.
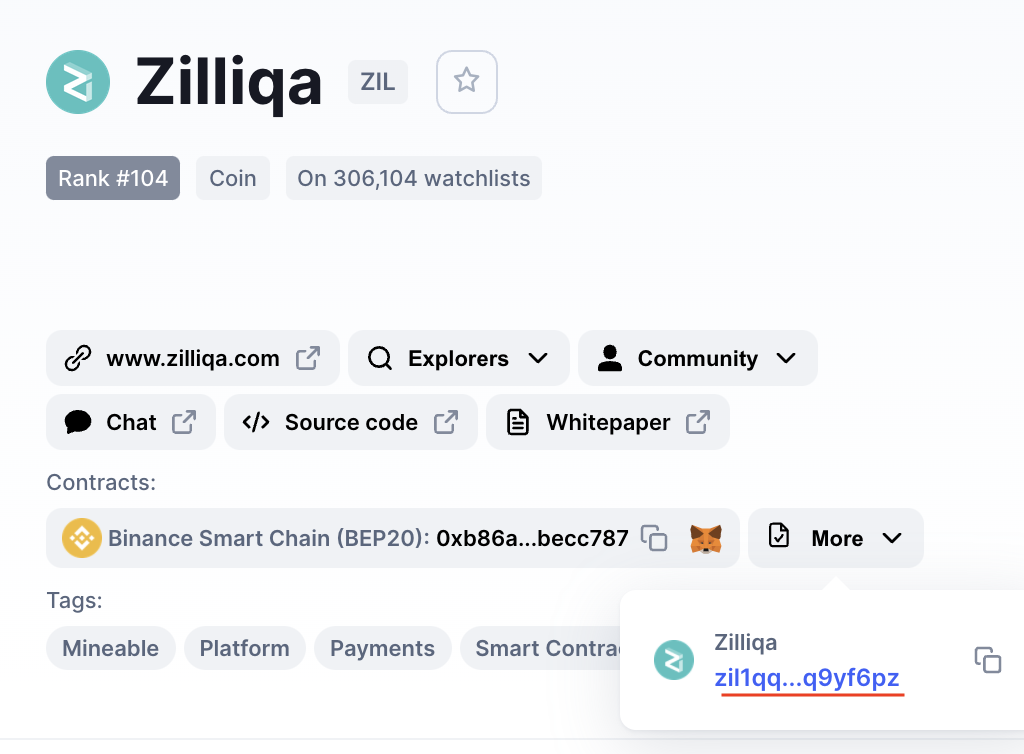
However, since Metamask does not support the Zilliqa blockchain, you can’t add this to your wallet.
Double-check that ZIL is detected and select ‘Add Custom Token’
Once you’ve copied the Contract Address, you can paste it into the ‘Token Contract Address‘ field in Metamask.
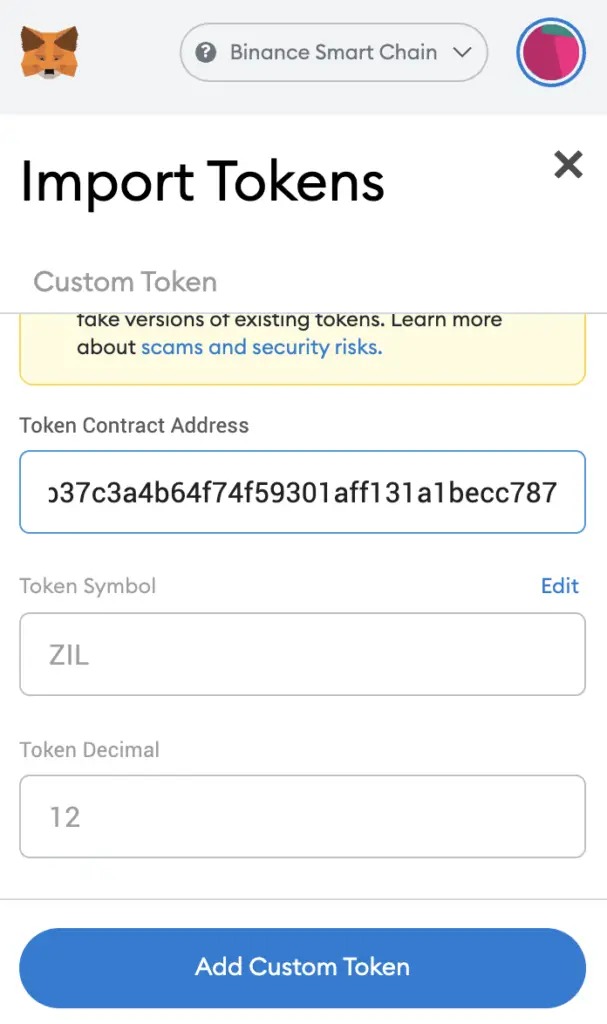
If you pasted the correct contract address, ZIL should automatically appear as the Token Symbol.
After selecting ‘Add Custom Token‘, you will need to confirm importing ZIL one more time.
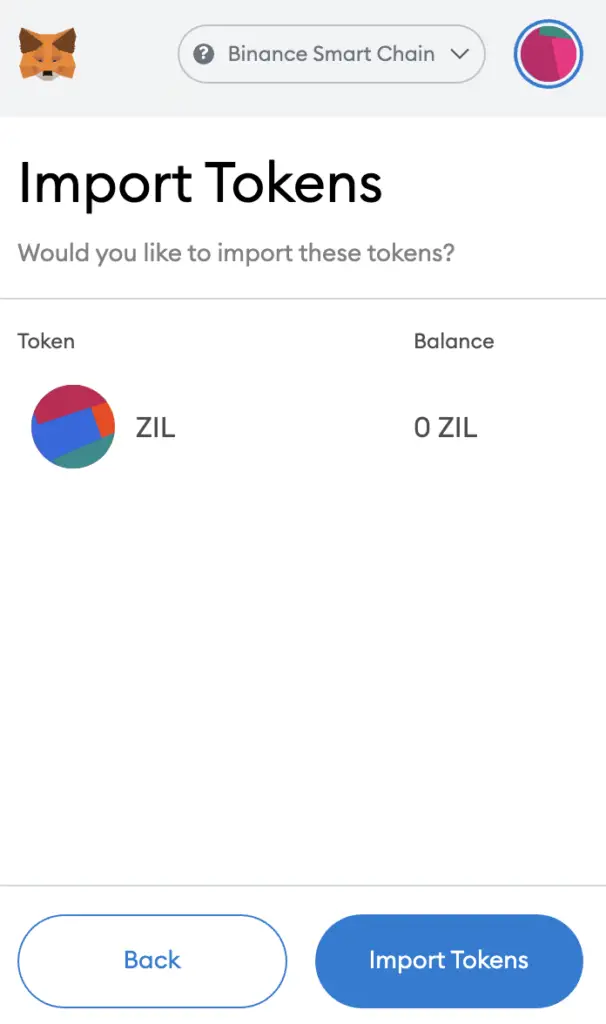
Once you’ve successfully imported ZIL to your Metamask wallet, you should see it as one of your assets under the Binance Smart Chain.
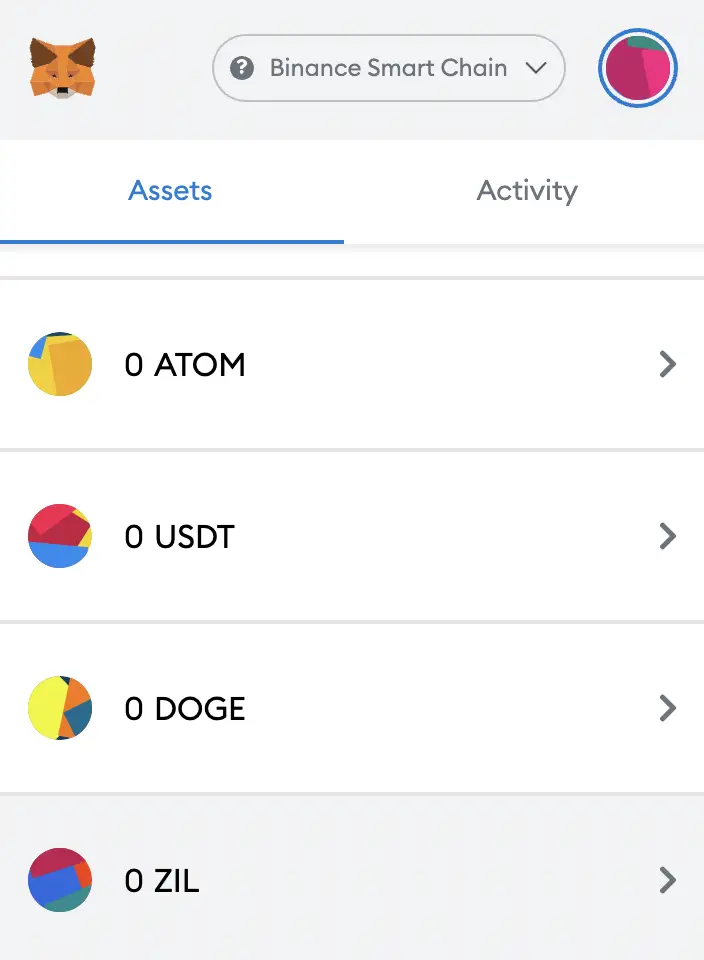
This will allow you to view any ZIL that you’ve deposited via the BSC!
Conclusion
When you add ZIL on Metamask, you are holding ZIL that is on the Binance Smart Chain (BEP20). This allows you to send and receive ZIL on the Binance Smart Chain, even though the Zilliqa blockchain is different from the Binance Smart Chain.
This process is similar to how you would add DOT, ATOM, BTCB and ADA to your Metamask wallet too.

Do you like the content on this blog?
To receive the latest updates from my blog and personal finance in general, you can follow me on my Telegram channels (Personal Finance or Crypto) and Facebook.
Are you passionate about personal finance and want to earn some flexible income?

