Last updated on June 8th, 2022
BUSD is one of the more well-established stablecoins, and it can be added to multiple networks.
Here’s a guide to show you how to add BUSD to some of the networks that are supported by Metamask.
Contents
Can you add BUSD to Metamask?
You are able to add BUSD to your Metamask wallet on any networks that are compatible with the Ethereum network (e.g. Harmony and Velas). However, you aren’t able to add BUSD to your Metamask wallet using networks that are not compatible with the Ethereum network (e.g. Solana or Binance Chain).
There are many networks that you can add BUSD to, which you can view on the BUSD page on CoinMarketCap.
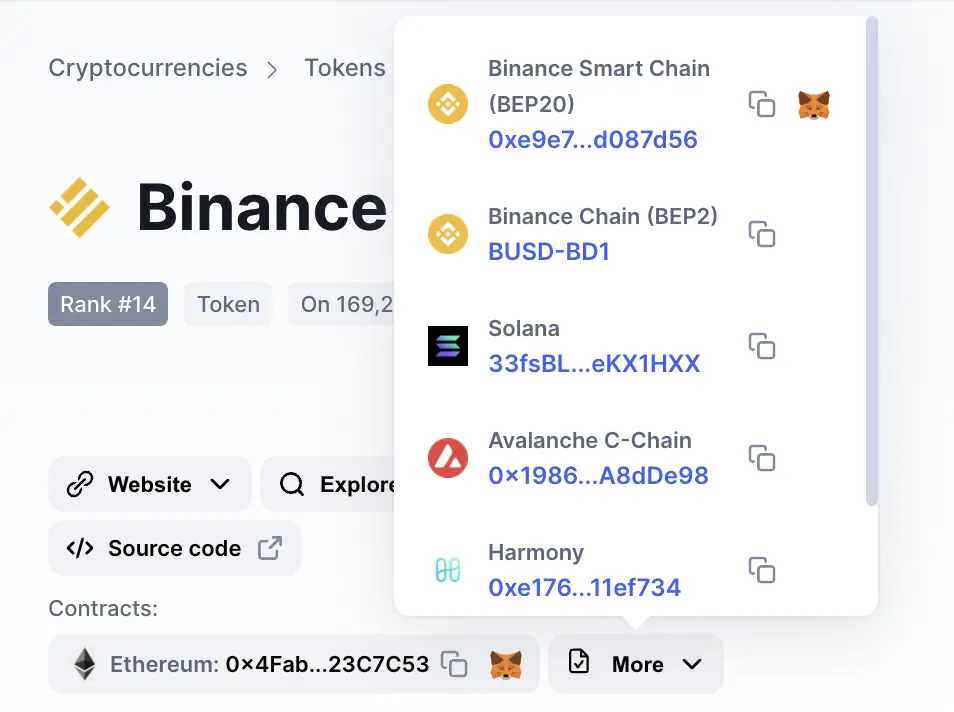
You are able to add BUSD to networks that are supported by Metamask, which are mainly those which are compatible with the Ethereum network.
However, BUSD can exist on other networks, such as Solana and Binance Chain. You will not be able to add these versions of BUSD to your Metamask wallet since Metamask does not support them.
How to add BUSD to Metamask on the ERC20 network
Here are 3 steps to add BUSD to Metamask on the ERC20 network:
- Go to your Metamask wallet and ensure that you are using the Ethereum Mainnet
- Select ‘Import Tokens’, and then search for BUSD
- Confirm the addition of BUSD to your Metamask wallet
Go to your Metamask wallet and ensure that you are using the Ethereum Mainnet
The first thing you’ll need to do is to ensure that you are using the Ethereum Mainnet on Metamask.
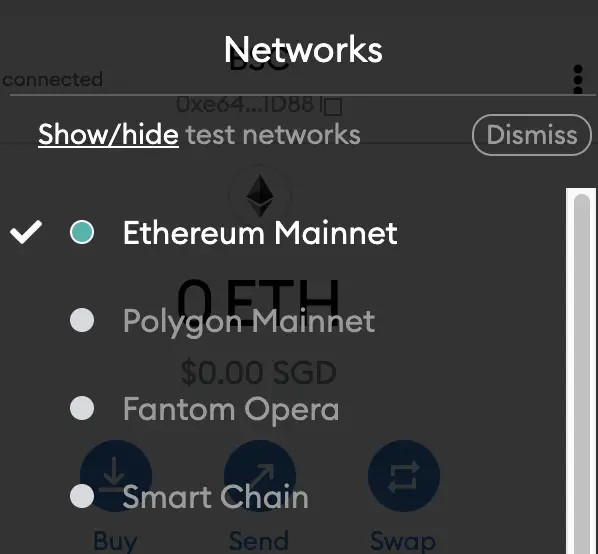
This is the default network for all Metamask wallets. However, you are also able to connect Metamask to other blockchain networks, such as:
As such, do remember to be on the Ethereum Mainnet before moving on to the next step.
Select ‘Import Tokens’, and then search for BUSD
Once you’re on the Ethereum Mainnet, the next step will be to select ‘Import Tokens‘.
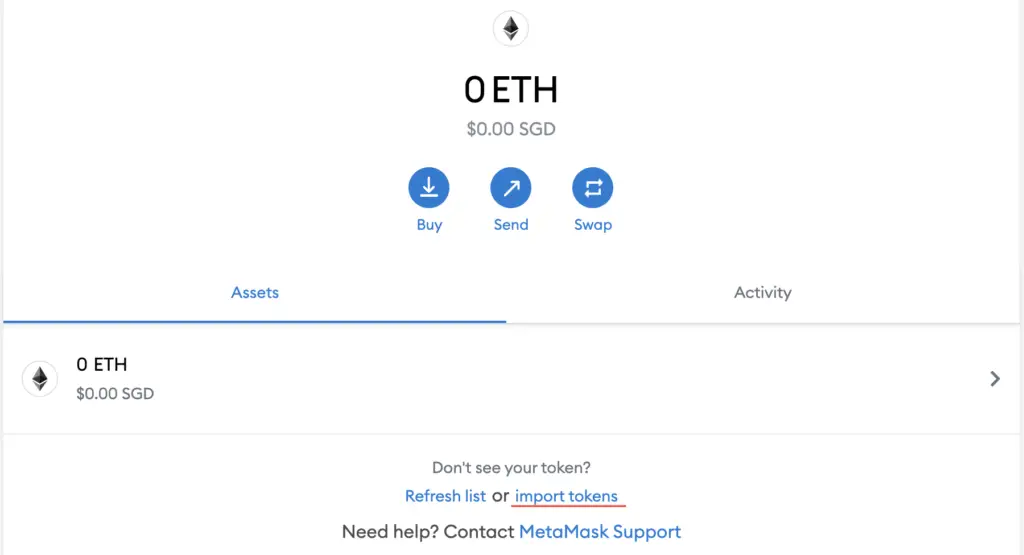
On the ‘Search‘ tab, you can search and select BUSD as the token that you wish to import.
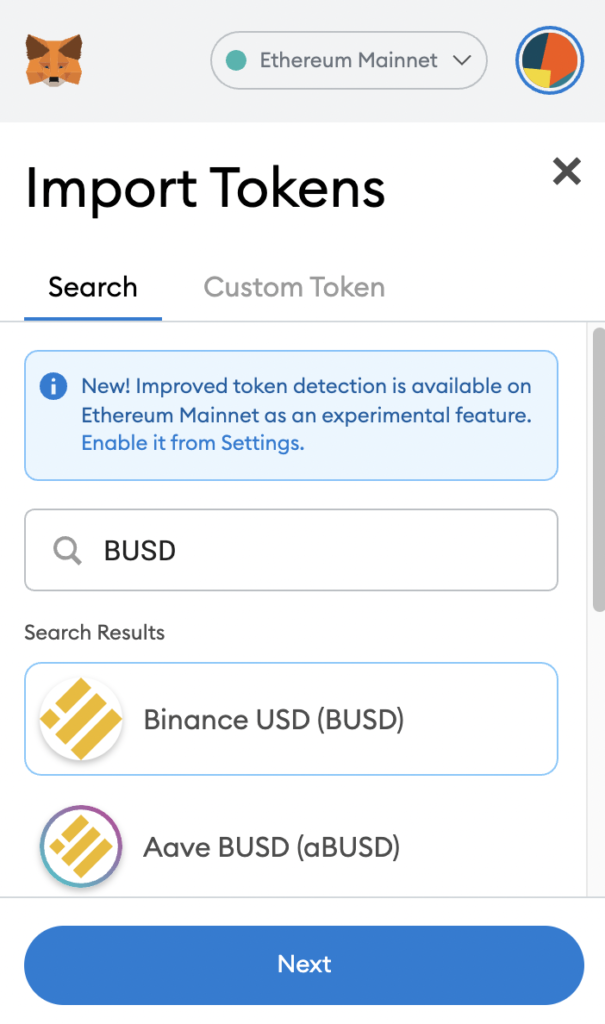
Confirm the addition of BUSD to your Metamask wallet
The last step you will need to do is to confirm importing BUSD one more time.
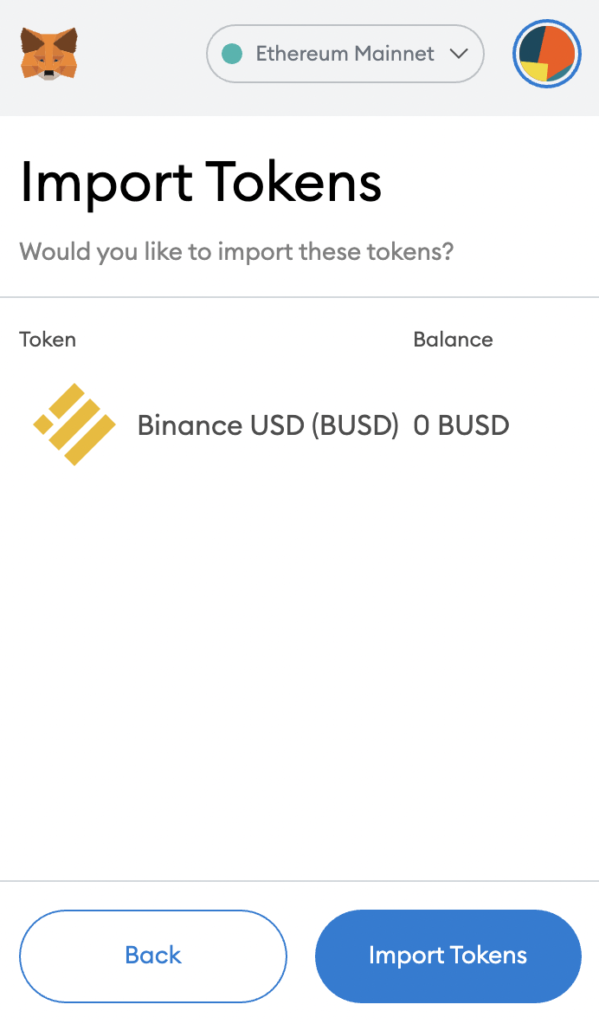
Once you’ve successfully imported BUSD to your Metamask wallet, you should see it as one of your assets under the Ethereum Mainnet.
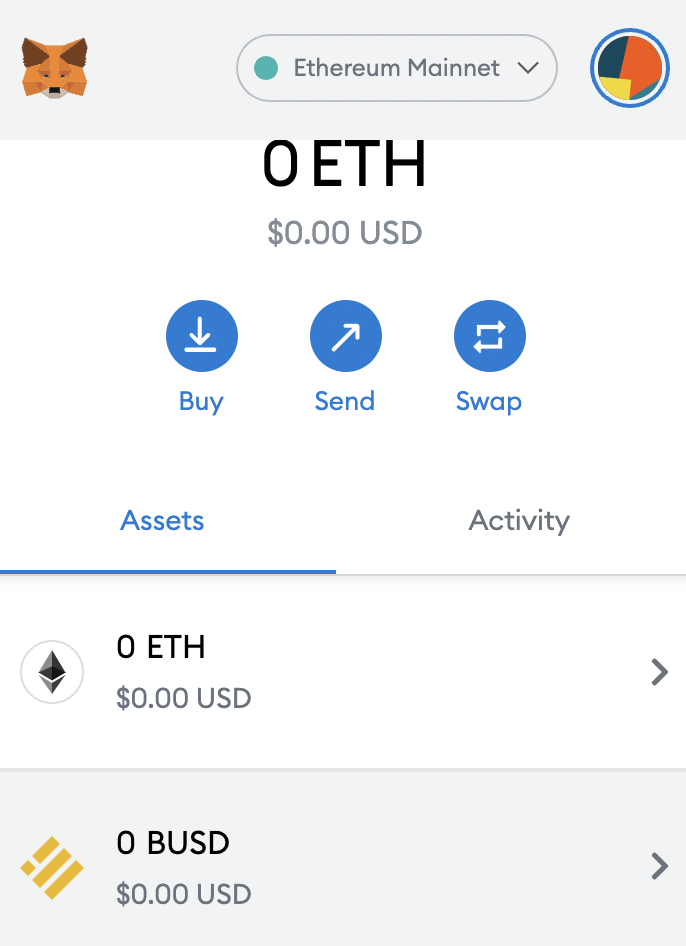
This process is similar to adding other tokens, such as RARI or MANA.
How to add BUSD to Metamask on the Binance Smart Chain
Here are 4 steps to add BUSD to Metamask on the Binance Smart Chain:
- Go to Metamask and ensure that you are using the Binance Smart Chain
- Select ‘Import Tokens’, and then ‘Import Custom Token’
- Copy the Binance Smart Chain contract from CoinMarketCap
- Double check that BUSD is detected and select ‘Add Custom Token’
Go to Metamask and ensure that you are using the Binance Smart Chain
The first thing you’ll need to do is to ensure that you are using the Binance Smart Chain on Metamask.
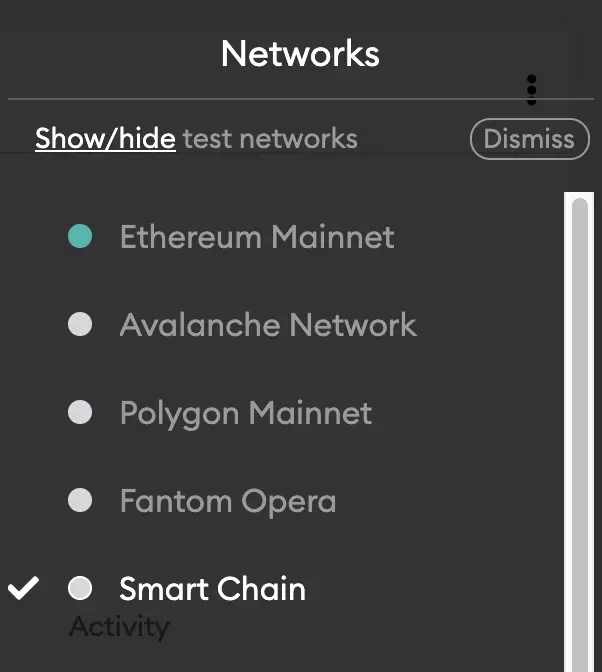
If you have not set up the Binance Smart Chain on your Metamask wallet, you can check out this step-by-step guide here.
Alternatively, you can view this video on how to add any new networks automatically with just one click:
Select ‘Import Tokens’, and then ‘Import Custom Token’
Once you’re on the Binance Smart Chain, the next step will be to select ‘Import Tokens‘.
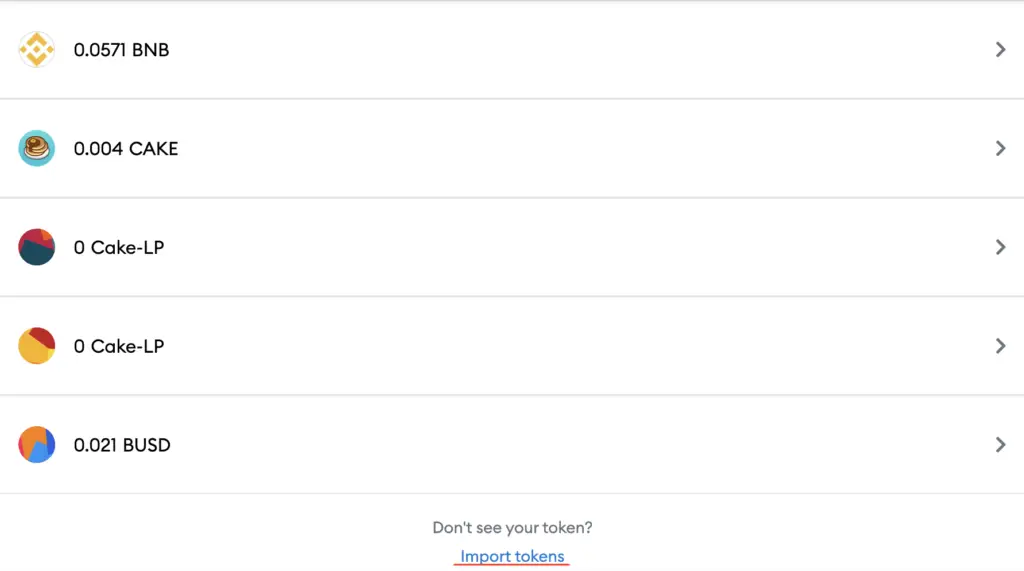
On the Binance Smart Chain network, you are only able to import custom tokens.
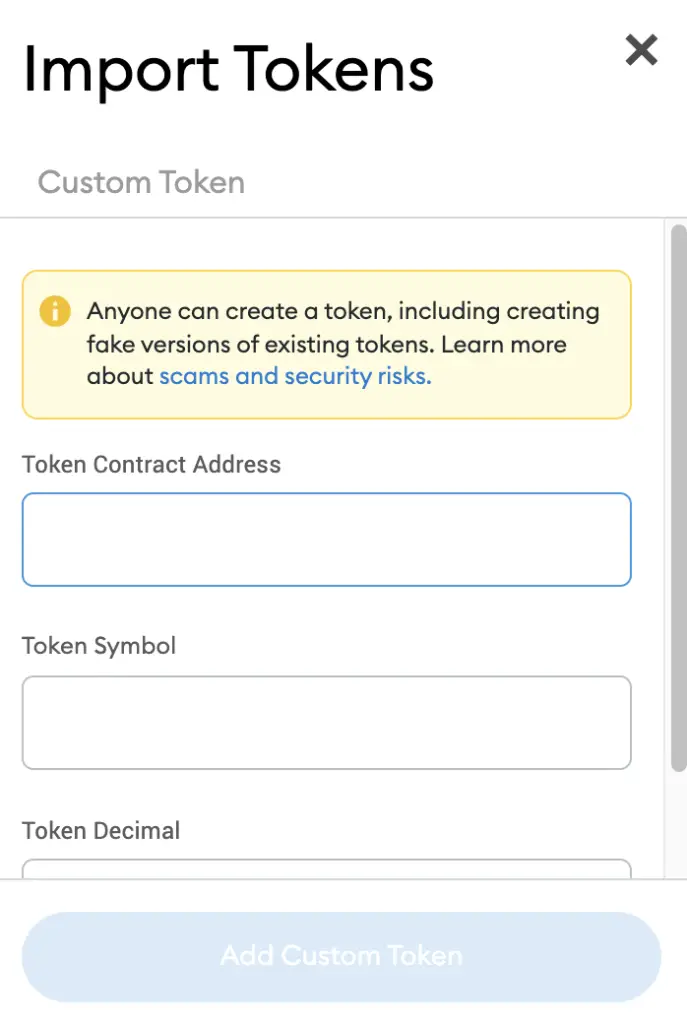
Copy the Binance Smart Chain contract from CoinMarketCap
For the next part, you can go to the BUSD page on CoinMarketCap.
I prefer using CoinMarketCap to obtain the contract address, as it is one of the most reliable sites with regards to cryptocurrencies.
It is important that you ensure that the site where you’re obtaining the contract address from is a credible source!
There is a section called ‘Contracts‘, where you’ll see the BSC contract for BUSD after clicking on ‘More’.
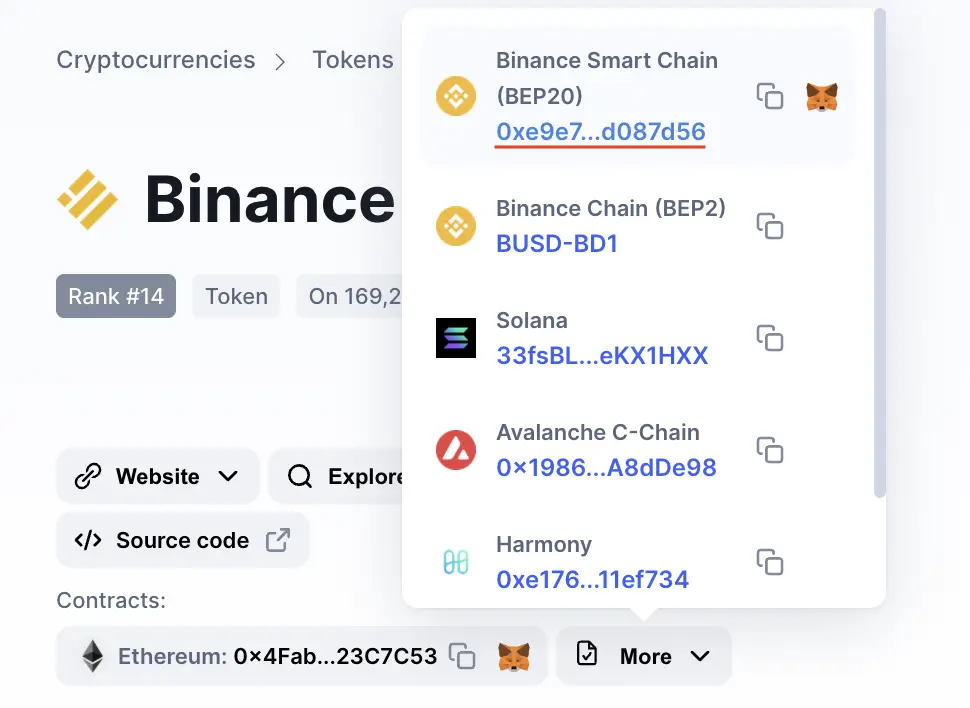
You can click on the contract and it will be copied to your clipboard.
Double check that BUSD is detected and select ‘Add Custom Token’
Once you’ve copied the Contract Address, you can paste it in the ‘Token Contract Address‘ field in Metamask.
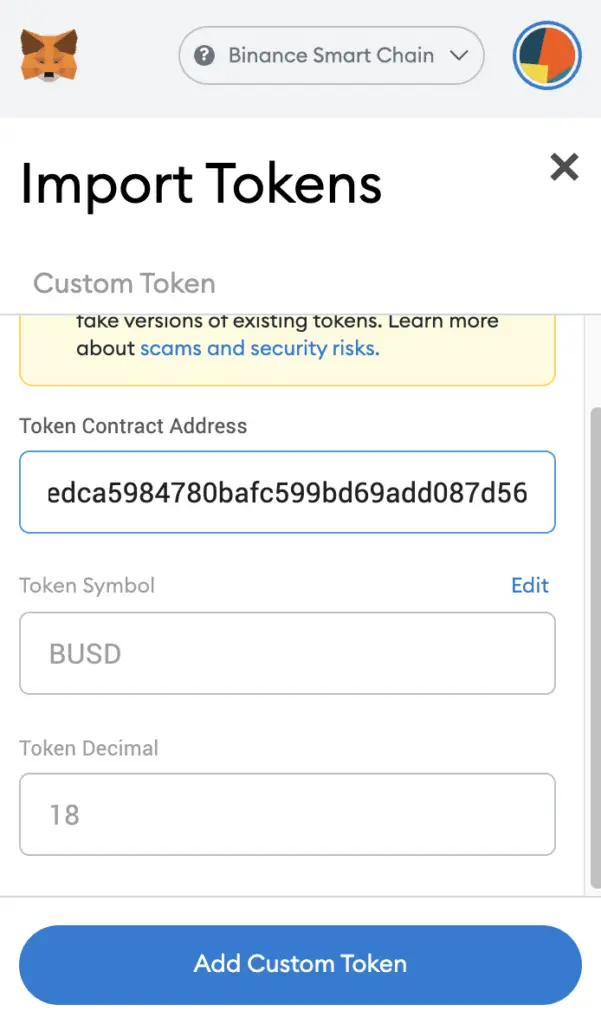
If you pasted the correct contract address, BUSD should automatically appear as the Token Symbol.
After selecting ‘Add Custom Token‘, you will need to confirm importing BUSD one more time.
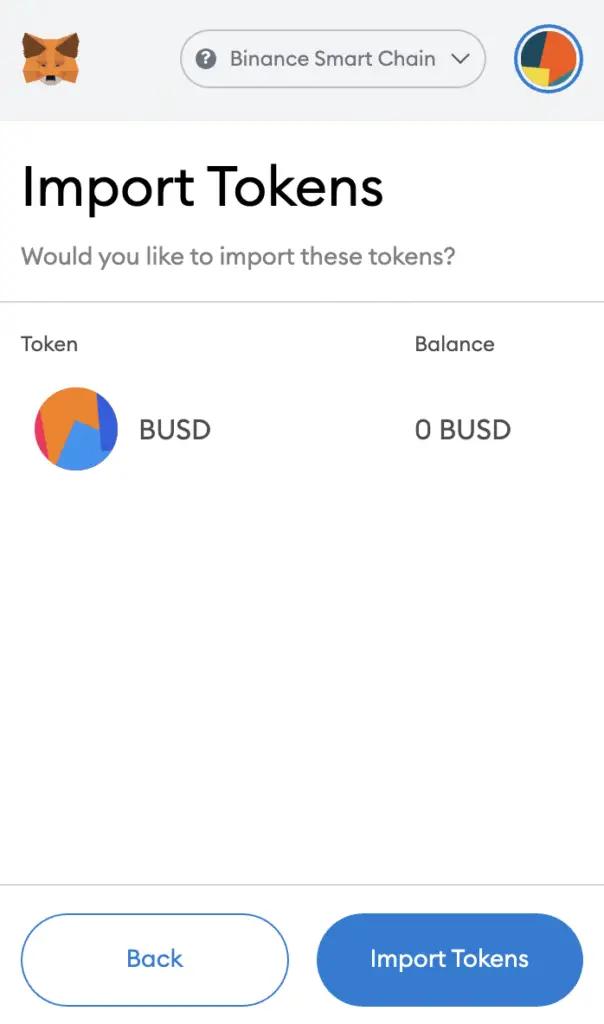
Once you’ve successfully imported BUSD to your Metamask wallet, you should see it as one of your assets under the Binance Smart Chain.
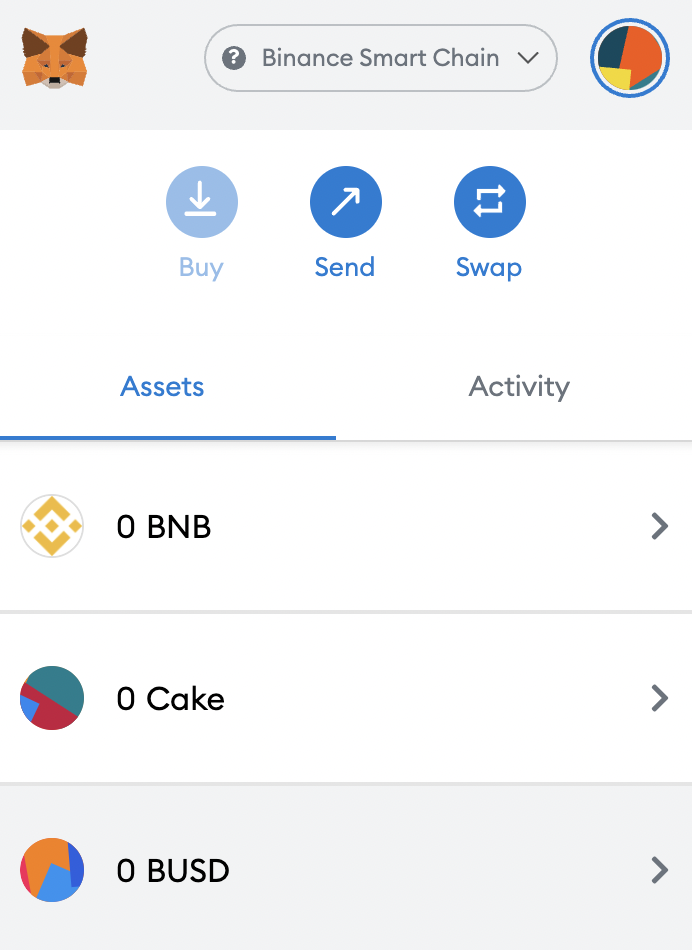
This is the Binance-Peg version of BUSD which is native to BSC, instead of the ERC20 version.
How to add BUSD to Metamask on the Harmony ONE Network
Here are 4 steps to add BUSD to Metamask on the Harmony ONE Network:
- Go to Metamask and ensure that you are using the Harmony Mainnet
- Select ‘Import Tokens’, and then ‘Import Custom Token’
- Copy the Harmony contract from CoinMarketCap
- Double check that BUSD is detected and select ‘Add Custom Token’
And here is each step explained:
Go to Metamask and ensure that you are using the Harmony Mainnet
The first thing you’ll need to do is to ensure that you are using the Harmony Mainnet on Metamask.
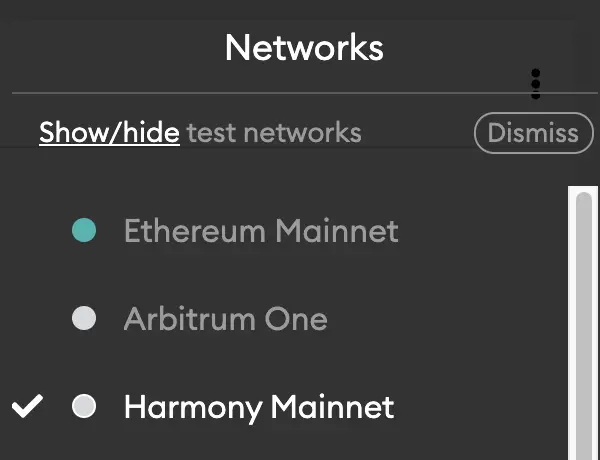
If you have not set up the Harmony Network on your Metamask wallet, you can check out this step-by-step guide here.
Select ‘Import Tokens’, and then ‘Import Custom Token’
Once you’re on the Harmony Mainnet, the next step will be to select ‘Import Tokens‘.
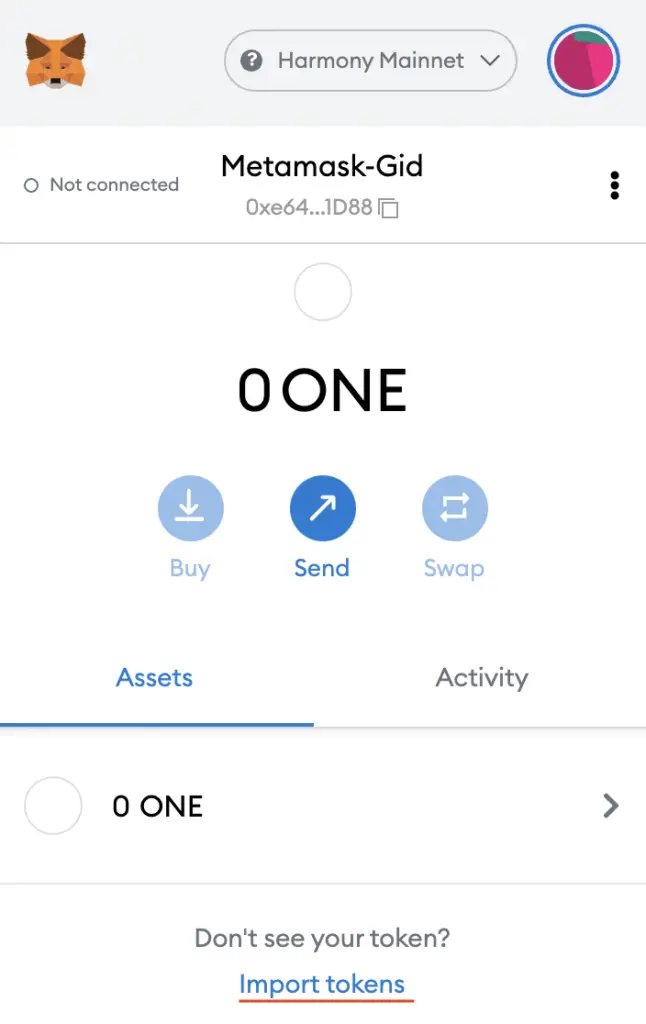
On the Harmony network, you are only able to import custom tokens.

Copy the Harmony contract from CoinMarketCap
For the next part, you can go to the BUSD page on CoinMarketCap.
There is a section called ‘Contracts‘, where you’ll see the Harmony contract for BUSD.
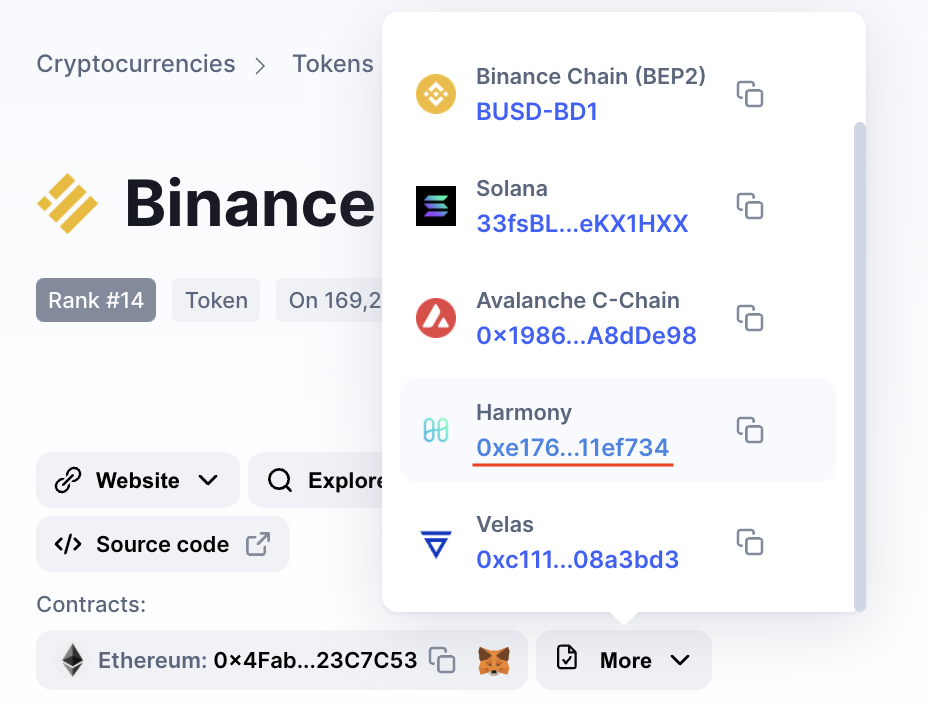
You can click on the contract and it will be copied to your clipboard.
Double check that BUSD is detected and select ‘Add Custom Token’
Once you’ve copied the Contract Address, you can paste it in the ‘Token Contract Address‘ field in Metamask.
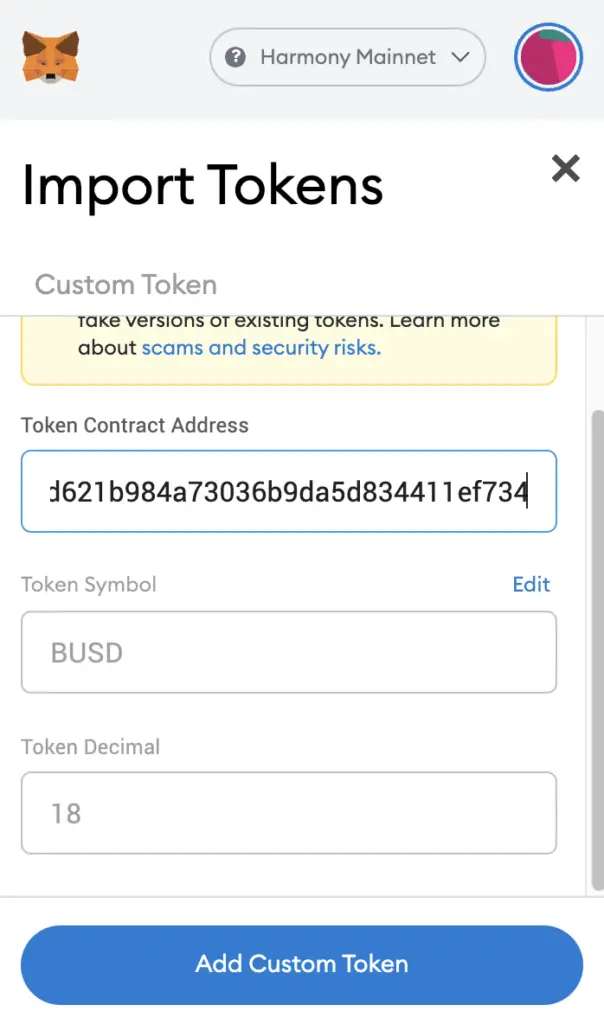
If you pasted the correct contract address, BUSD should automatically appear as the Token Symbol.
After selecting ‘Add Custom Token‘, you will need to confirm importing BUSD one more time.
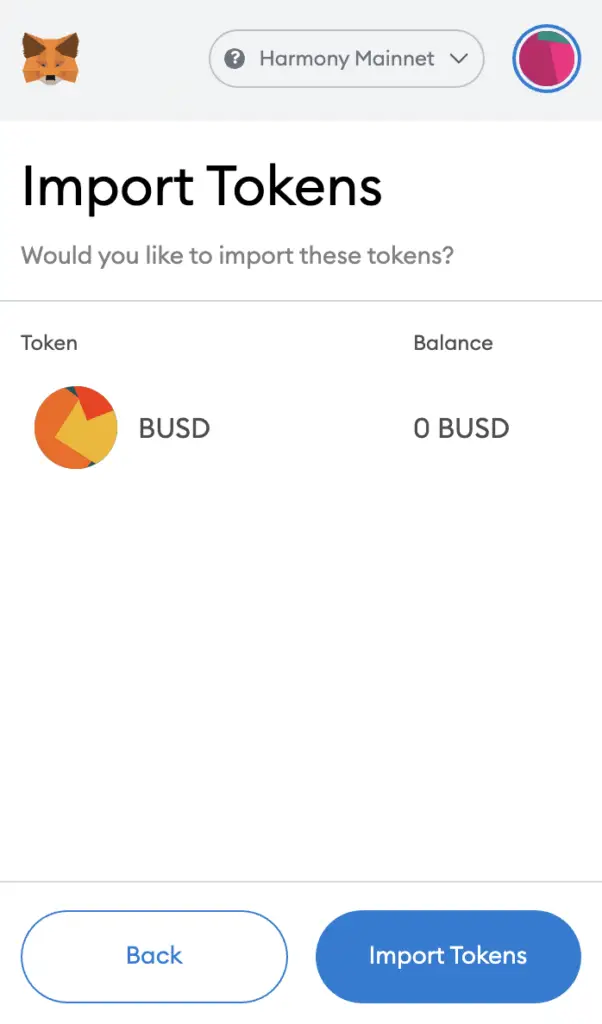
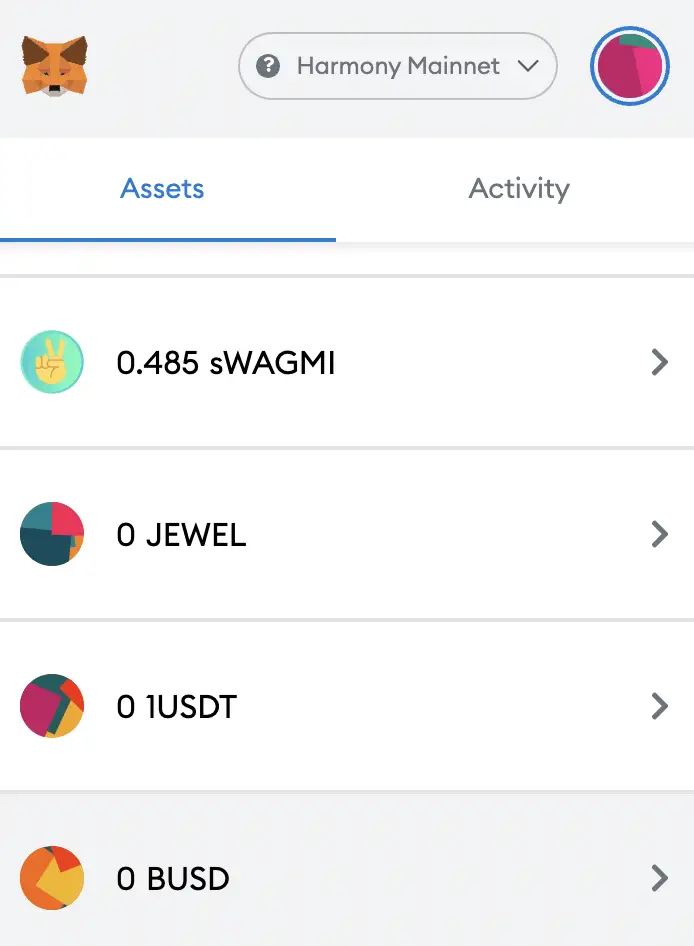
Once you’ve successfully imported BUSD to your Metamask wallet, you should see it as one of your assets under the Harmony Mainnet.
How to add BUSD to Metamask on the Velas Network
Here are 4 steps to add BUSD to Metamask on the Velas Network:
- Go to Metamask and ensure that you are using the Velas Network
- Select ‘Import Tokens’, and then ‘Import Custom Token’
- Copy the Velas contract from CoinMarketCap
- Double check that BUSD is detected and select ‘Add Custom Token’
And here is each step explained:
Go to Metamask and ensure that you are using the Velas Network
The first thing you’ll need to do is to ensure that you are using the Velas Network on Metamask.
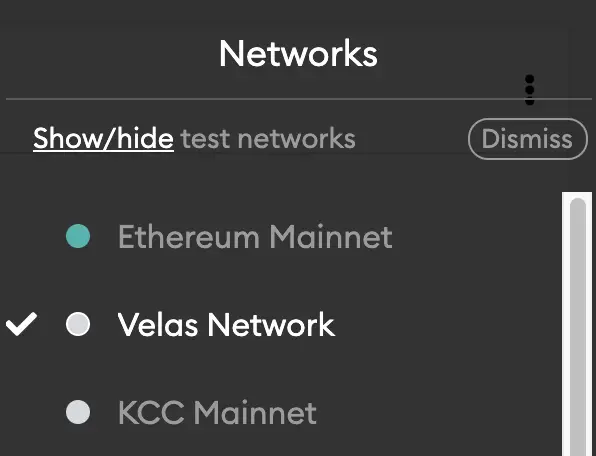
If you have not set up the Velas Network on your Metamask wallet, you can check out this step-by-step guide here.
Select ‘Import Tokens’, and then ‘Import Custom Token’
Once you’re on the Velas Network, the next step will be to select ‘Import Tokens‘.
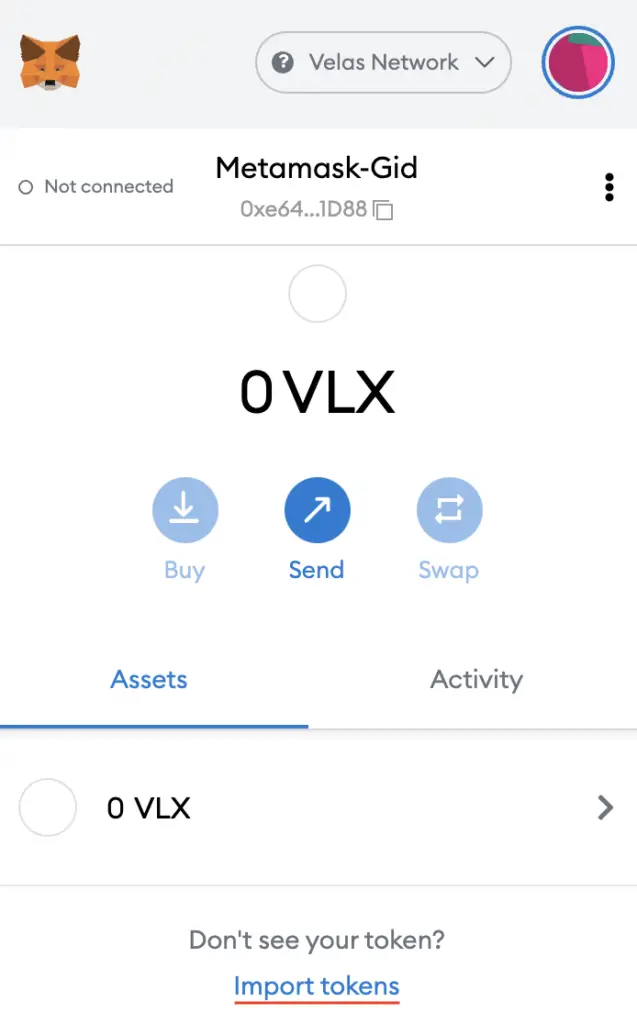
On the Harmony network, you are only able to import custom tokens.

Copy the Velas contract from CoinMarketCap
For the next part, you can go to the BUSD page on CoinMarketCap.
There is a section called ‘Contracts‘, where you’ll see the Velas contract for BUSD.
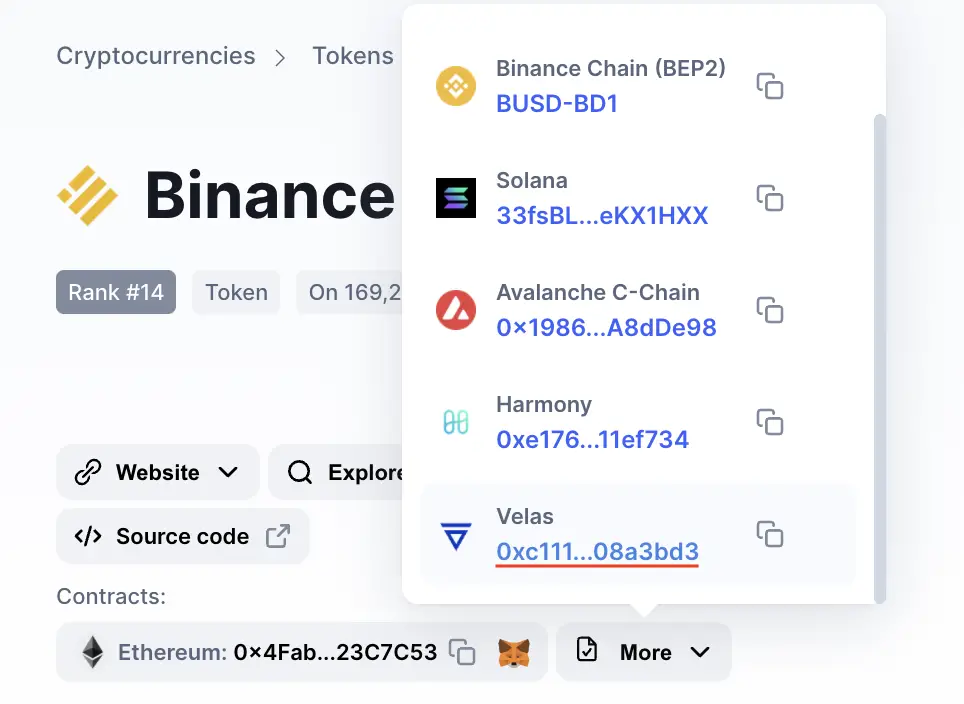
You can click on the contract and it will be copied to your clipboard.
Double check that BUSD is detected and select ‘Add Custom Token’
Once you’ve copied the Contract Address, you can paste it in the ‘Token Contract Address‘ field in Metamask.
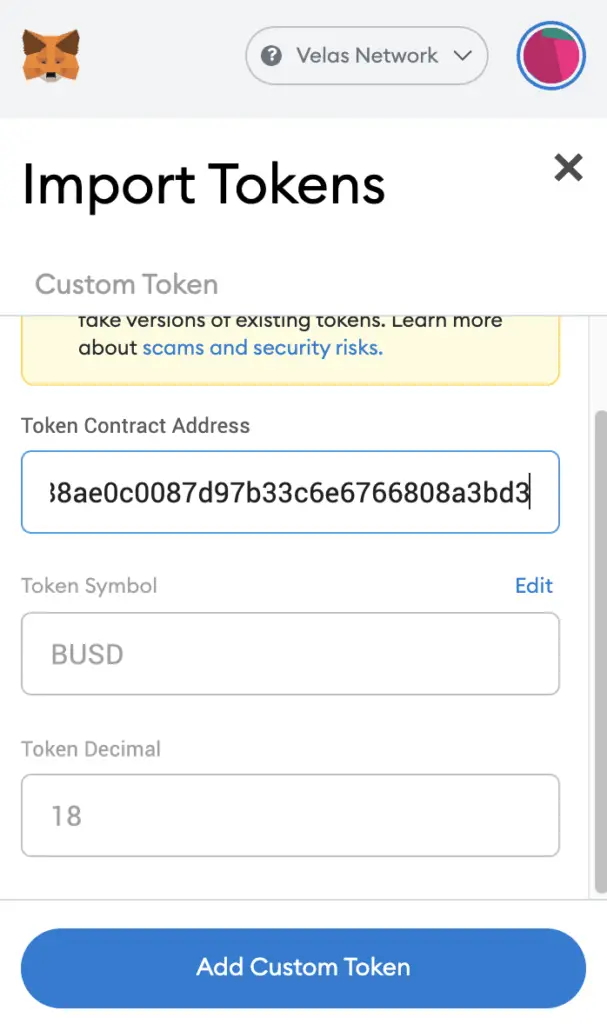
If you pasted the correct contract address, BUSD should automatically appear as the Token Symbol.
After selecting ‘Add Custom Token‘, you will need to confirm importing BUSD one more time.
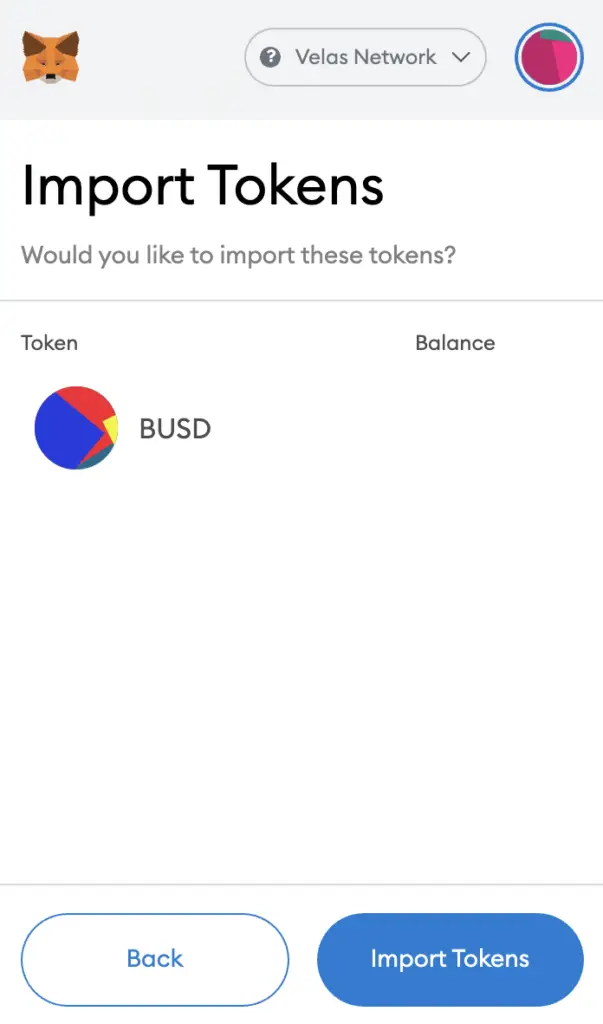
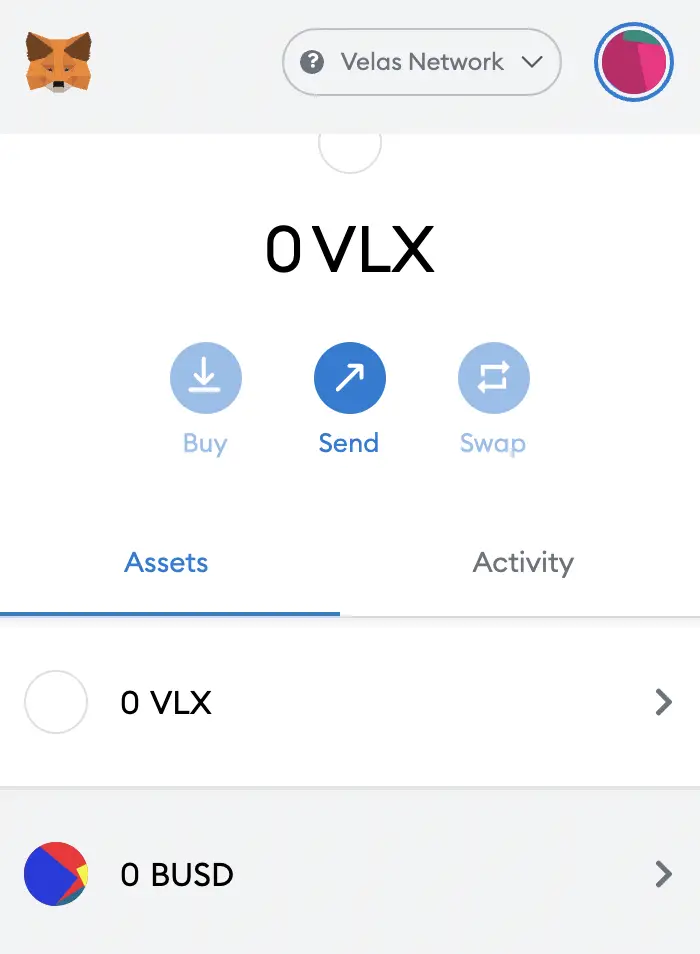
Once you’ve successfully imported BUSD to your Metamask wallet, you should see it as one of your assets under the Velas Network.
Conclusion
You are able to add BUSD to a variety of networks on Metamask.
This is similar to other multi-chain cryptocurrencies, such as USDC, DAI or MIM.
However, there are still some versions of USDT (such as the Solana version) which can’t be added to Metamask. As such, it will be good to double check if Metamask and the platform that you’re withdrawing from both support the network that you intend to use for the withdrawal.
Are you passionate about personal finance and want to earn some flexible income?

